Back to CrisisManager Main Menu
Formatting Tips
This page provides tip and tricks on the best format and functionally for your mobile crisis plan.
Watch the Video Tutorial:

General Size Guidelines
For optimal plan function and aesthetics, we recommend adhering to a few guidelines. *Note: Sizes can vary based on preference, or mobile platform in which plans are being viewed.
- Plan icon: 80 by 80 PIXELS or 100 by 100 PIXELS
- Plan banner and action images: Recommended width is between 300 PIXELS - 350 PIXELS, recommended height is 100 PIXELS
- PDF attachments: No greater than 1.5MB
- Recommended font size: Arial, 14 point font works best for clarity within the app. It is suggested that administrators update all fonts to Arial 14 after copying, pasting, and editing the content within the Online Portal.
- Total plan size: We recommend plans to not exceed 12MB. This is the optimal size for performance on all devices.
Event Information Tips
- Recommended pasting method: Word documents are the recommended source type for the easiest transition into the Online Portal. When copying and pasting from a PDF use the Paste as Plain Text (
 ) paste option.
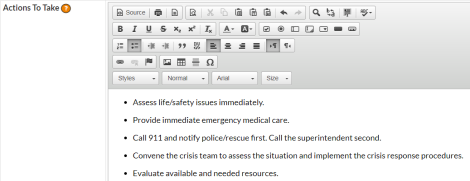
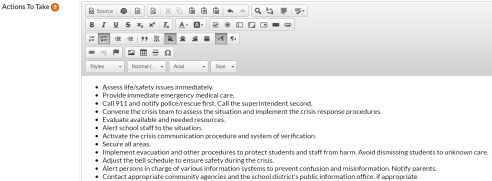
 - List formatting: To decrease the line space between bullet points, numbered lists, or different lines of information, highlight the content and change the Format from Normal to Normal (DIV) in the dropdown menu.
| Normal Format: | Normal (DIV) Format: |
|
|
Actionable Links
Phone Numbers
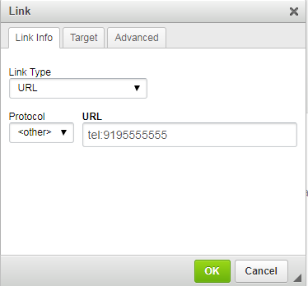
- Within the Event Text, highlight the phone number.
- Click on the link icon (
 ), and select <other> from the Protocol drop down menu.
 - Type the phone number in the following format: tel:xxxxxxxxxx. *Note: There should be no spaces between tel: and the digits of the phone number.
- Click OK.
Email Addresses
- Within the Event Text, highlight the email address or desired text.
- Click on the link icon (
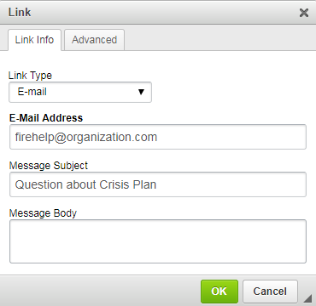
 ), and select E-mail from the Link Type drop down menu.
 - Enter the desired email into the E-mail Address text box as shown below.
- Enter a Message Subject and Message Body if you would like the email populated with that information.
Quick Reference Links
Create section headings which will serve as the places your users will navigate to within the Event.
- Anchor each of the sections by placing your cursor in front of the section heading and selecting the anchor icon (
 ) from the toolbar.
 - Enter the Anchor Name and click OK.
![]()
- At the top of your Event create your table of contents menu by typing out the names of the sections below that you have just anchored.
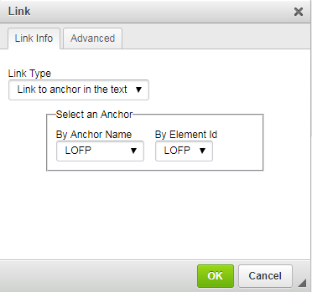
- Highlight the selected section heading at the top of your Event in the table of contents and click the link icon ().
- Change the Link Type to Link to anchor in the text, and use the Anchor Name drop down menu to match it up to the corresponding section heading.
- Click OK.
Many administrators will choose to create a Top anchor, so at the end of each section users can jump back up to the top of the Event and choose another link from the table of contents.
Google Map Addresses
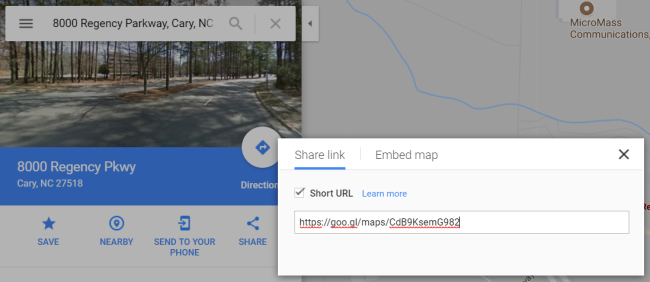
- Search for your location using Google Maps at maps.google.com.
- Click Share in the left side panel.
- On the Share link tab, check the box next to Short URL and copy the link from the text box below it.
- Navigate back to the CrisisManager online portal and highlight the desired text or address.
- Click the link icon (
 ).
). - Paste the link from Google Maps in the text box.
- Click OK.

Tables
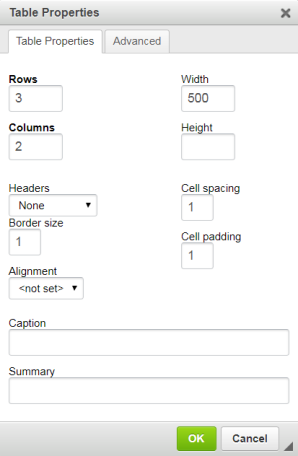
Tables are a great feature to use when trying to keep text aligned within an event. The table is set up much like a table in Word or Excel.
- Click on the table icon (
 ) in the toolbar and a Table Properties window will appear.
 - Set the table’s size and positioning within the event text screen. For Width and Height, enter the number of pixels, or the percentage of the screen the Width or Height should consume. *Note: For the table to automatically adjust to the size of the mobile device it is displayed on, change the Width to 95%.
- Change the Cell spacing, Border size, and Cell padding all to a value of 0 if you would like to make the table borders invisible when the plan is published to mobile devices. This could be useful if you are using the table only to align and format text.
- Click OK.